
Shining a light on wildlife after dark
There’s no need to stop shooting when the sun goes down, as our latest concise guide explains.
We love photographing African wildlife at night: it’s exciting, unpredictable and can produce some outstanding images. Specialist nocturnal hides, pioneered in South Africa’s Zimanga game reserve, offer stunning photographic opportunities without the need for specialist equipment or knowledge, and we’ll be tackling night hide photography in a later tutorial. But it’s also possible to capture striking nocturnal shots from a traditional safari game-viewing vehicle, with nothing more sophisticated than a decent spotlight.
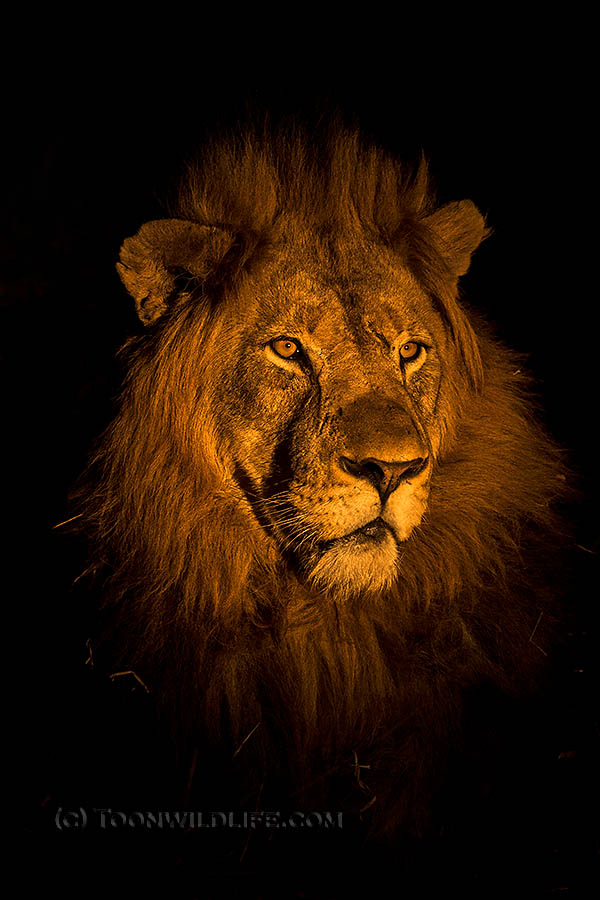
Lion, Zimanga, South Africa
Canon EOS-1Dx MkII with EF 100-400mm lens at 280mm, 1/160 sec, f/7.1, ISO 3200
Steve says: If you can distance yourself laterally as much as possible from the spotlight, you’ll generally improve the image (and reduce the risk of red-eye). Here, Ann was at the back of the game viewing vehicle, I was at the front, right next to the guide with the spotlight. Ann’s shot. three-quarter lit, benefits hugely from the subtle shadow moulding. My shot, lit straight on, was an almost identical composition, but felt flat in comparison.
Our top tips for spotlighting on safari
- Spotlighting produces a softer, more flattering light than flash, allows for easier focusing, as you can train the light on a subject for a few seconds at a time, and is less disturbing for the animal.
- Africa’s national parks mostly don’t allow self-driving after dark, but there may be a period of semi-darkness very early in the morning or last thing in the evening, when you can use a torch or spotlight from your vehicle. You really need a second pair of hands to operate the light, working solo is very tricky.
- Be aware of local rules and etiquette. When photographing newly-hatched loggerhead turtles on a beach in South Africa, our specialist guide explained that the hatchlings get to the sea by heading for the light (the brightness of breaking waves under the moonlight), so it was vital to only shine a torch on them from the seaward side, and to keep it brief.
- Best is to visit a private reserve where night drives are permitted, with a knowledgeable guide who can locate subjects and handle the spotlight responsibly. Our favourite locations are Zimanga and Elephant Plains in the Sabi Sand, both of which have a good chance of finding exciting subjects after dark, and excellent guides who understand how to position the vehicle and operate the light.
- On reserves and safaris specifically geared up for photography, it’s sometimes possible to work with two vehicles, enabling more creative possibilities with backlighting and sidelighting.
- For good spotlit images you need a charismatic subject in the right location – accessible and not obscured. If we find a good subject early in an evening drive, we’ll bookmark it and return as the light sweetens, then wait with it for the after-dark opportunity. Sometimes it even works out as planned!
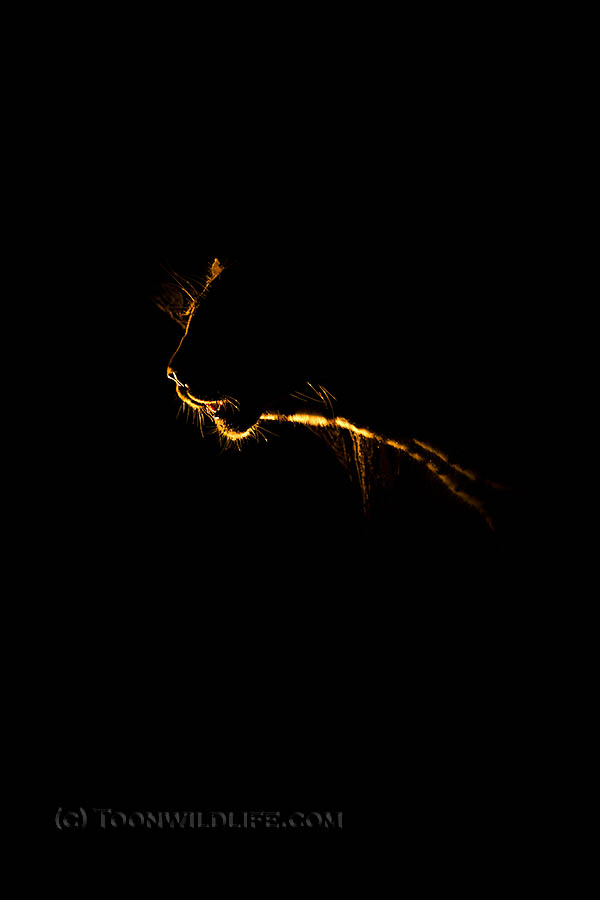
Leopard, Sabi Sand, South Africa
Canon EOS-1Dx MkII with EF 100-400mm lens at 238mm, 1/40 sec, f/8, ISO 1600
Ann says: Rimlighting can produce some exciting portraits, but you need two vehicles, taking it in turns to backlight the subject for each other, and expert photographer-friendly guides who know where to position. Perfect opportunities for rimlit shots are rare, but your chances improve dramatically in a reserve with regular sightings of habituated big cats, such as Sabi Sand.
- The welfare of your subject is always paramount, and never more so than at night. Bright lights can temporarily blind prey animals, making them vulnerable to predation, or expose hunting predators, reducing their chances of a kill. We won’t spotlight antelope or other prey animals at all, and we’ll only spotlight predators such as lion and leopard when they are static: first thing after sunset is often a good time, as they wake up, groom, yawn or play with each other. We may accompany them a short way when they start to move, but as soon as they show any sign of hunting we’ll stop.
- A responsible guide will only shine the light on an individual animal for a few seconds at a time, and even then only with the gentler edges of the beam, rather than full strength. You need to work quickly to focus and shoot.
- With your camera set to manual, you’ll be adjusting shutter speed, aperture and ISO on the fly, as well as checking the histogram regularly. You really need to be know your equipment so that changing settings becomes second nature. Make sure you know how to check and adjust settings on the rear LCD, which is the easiest way to do so in the dark.
- It’s possible to photograph in aperture priority and play around with partial or spot metering combined with exposure compensation, to try to get a well exposed image – but it’s really difficult. Camera meters struggle in these conditions. Certainly don’t use evaluative or matrix metering, whcih invariably leads to massive overexposure of your subject.
- Fully manual operation is the better way to go. There’s no simple settings recipe, because it depends on the distance of your subject and the strength of the spotlight. But as a starting point, try ISO 2000, an aperture of f/4 of f/5.6, and a shutter speed of 1/200 sec.
- Take a shot, check the histogram on the back of your camera, and adjust settings to correct any over or under exposure. To increase brightness of your subject, slow your shutter speed (but not too much, or you’ll have a blurry image due to subject movement or camera shake) or increase ISO. If your subject is too bright, select a faster shutter speed.
- Reshoot, check your histogram, and keep adjusting your settings until you’re happy with the exposure. If the subject moves closer or further away, you’ll need to do this all over again!
- Make sure you use the histogram or a clippings warning to check you are exposing correctly. Just looking at the review image on the LCD isn’t good enough, as this will depend on how bright you’ve got your LCD set.
- We like to shoot a little dark, then bring up exposure in post processing. There’s anothing worse than an overexposed spotlit image with blown highlights, a common mistake. You want to try to retain a good tonal range and keep the background dark.
- Another common mistake is not composing tight enough. There’s no point shooting wide and surrounding your subject with acres of black, only to have to crop massively in post. Try to frame reasonably tightly – you can always extend the canvas in post if you want to.
- We set white balance to auto (AWB), as it’s easy to correct our RAW files in post (a little warming often helps). If you’re shooting jpegs (why!?), be prepared to adjust white balance in camera to get the feel you are after – tungsten often works, but it depends on the characteristics of the spotlight being used.
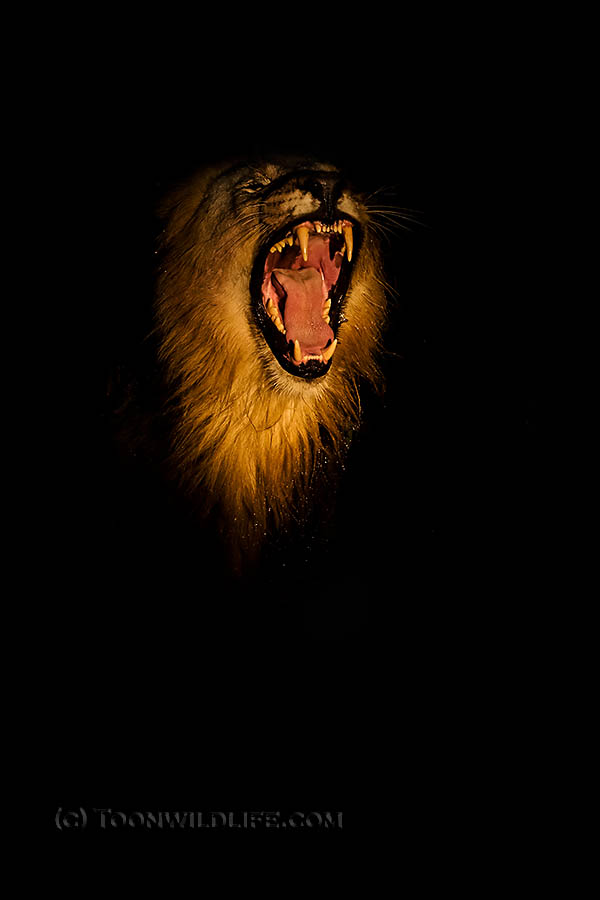
Lion yawning, Zimanga, South Africa
Canon EOS-1Dx MkII with EF 100-400mm lens at 222mm, 1/250 sec, f/8, ISO 4000
Steve says: Capturing action under a spotlight is very challenging, as light levels are so low, but if you push your ISO so you can use a shutter speed of, say, 1/250 sec, and try to capture moments where the movement is minimal (such as the peak of a lion’s yawn), you do have a chance. Firing a short burst, rather than a single shot, should improve your hit rate.
- If you’ve got a fast lens, such as f/2.8, you’ll find focussing easier, and be able to shoot at higher speeds wide open. But bear in mind you will have minimal depth of field, so depending on the distance and shape of your subject, you may need to stop down to achieve adequate focus throughout the critical parts of your subject.
- We like the flexibility of zooms when working from a vehicle at night. Our most used lens at night is a 100-400mm f4.5-5.6. It’s slow, but with image stabilisation we can handhold down to 1/40 sec if we have to. A faster lens is better for moving subjects, but most of our night work is with static subjects: even with a fast lens action is hard to capture without flash.
- Ideally, use a bean bag to support your camera. If the animal is moving, it’s easier to handhold – just try to get as fast a shutter speed as you can. Don’t be scared to bump up your ISO: better a noisy but sharp image than a blurry, clean one. We try to shoot at 1600 or 2000 ISO, but we’ll go to 3200 or 6400 ISO if we have to. Noise reduction software is very good these days.
- We strongly recommend shooting in RAW. As in daylight, the aim is to get the image right in camera, but in reality this is a lot harder at night. RAW images give you a lot more latitude to correct exposure and white balance in post processing.
- Careful post-processing will bring out the best of your nocturnal shots, and we typically apply heavier manipulation than most of our diurnal images. But don’t go overboard. Night shots are artificial to start with, we don’t want them to lose any semblance of reality. We’re mainly looking to correct overall exposure, applying selective exposure adjustments to balance the image, for example by reducing excessive highlights, and reducing noise. We try to avoid too much ‘painting-in’ of backgrounds, which can look unnatural and clumsy. A hint of shrubbery or other animals in the background gives context.
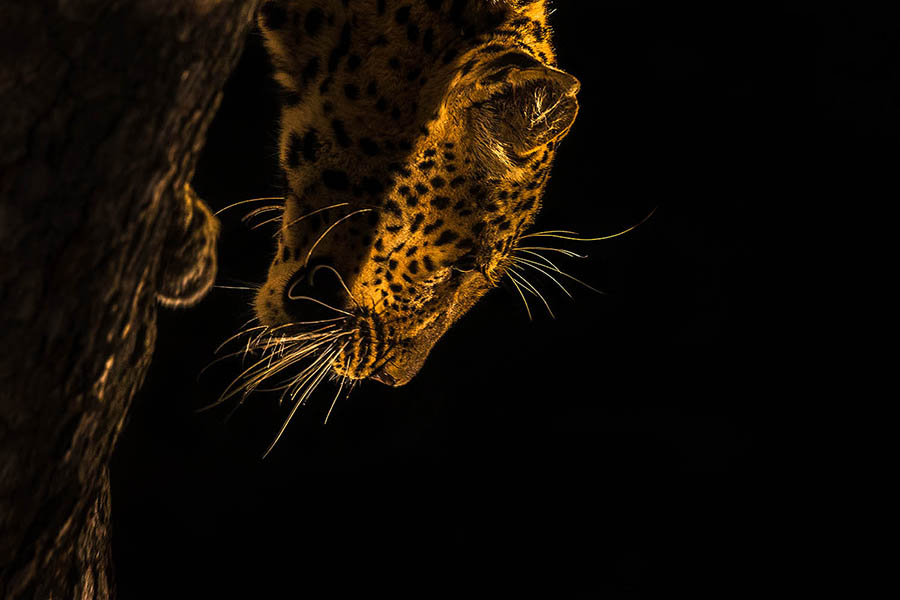
Leopard descending, Sabi Sand, South Africa
We rarely use a 1.4x extender after dark, as it makes the lens so slow, but on this occasion there had been no chance to take it off after shooting in the dusk. Nor was the ISO as high as it could have been. Yet even at 1/40 sec the shot worked – the lesson is, nothing ventured, nothing gained!
Canon EOS 1Dx II, EF100-400mm + 1.4x extender at 560mm, 1/40 sec, f/8, ISO 1600


Leave a Comment