
Achieving instant impact with wildlife silhouettes
In the first of a new series of bite-size guides to improving your safari photography we look at how to capture animal silhouettes.
If you’re looking for instant impact with your wildlife images, then animal silhouettes are hard to beat. Strong silhouette shots are all about distinctive shapes and vibrant, saturated colours. Subtlety can work, but it’s harder to pull off. Likewise, opportunistic silhouette images do come along occasionally, but the vast majority of our successful shots are the result of planning and previsualisation. When we’re on an evening cruise on the Chobe river, for example, we’ll start looking for likely subjects an hour before sunset, and mentally bookmark promising subjects such as elephants grazing on a low-lying island, to return to when the sun gets close to the horizon. Chobe’s sunsets are legendary, and our silhouette sessions are often one of the highlights of the safari for guests, producing some of their most memorable images. As with so much wildlife photography, the key is to keep it simple. Take a look at our tips, and give it a go!
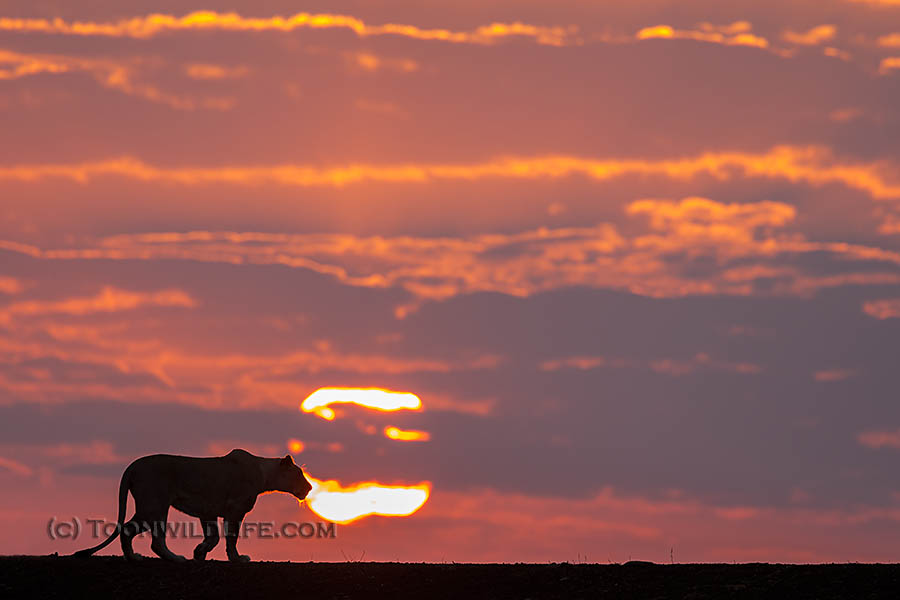
Canon EOS 1Dx, EF100-400mm + 1.4x Extender, 1/250 sec, f/8, ISO 1600
Ann says: For your subject to stand proud of the horizon, it helps to shoot from a low viewpoint. One of our favourite spots on Zimanga for silhouettes is the dam wall, where we can position our vehicle below a good subject and achieve a clean background of sky. Knowing your location and pre-visualising shots makes it much easier to get into position for opportunities that can be fleeting.
Our top tips for shooting silhouettes
- Pick distinctively shaped animals – big cats, elephant, giraffe – which will be clearly identifiable, even as two dimensional ‘cut outs’. Large animals work best, but we’ve managed good shots even with small birds, such as starlings, specially if they are in good numbers.
- Try to frame the subject against the sky so that you don’t clip it’s legs. A low viewpoint helps. Avoid distracting background foliage, or long grass, that disrupts the outline. Move your position if necessary. If you can’t get the legs, but can get close to your subject, try zooming in for a close-up – for example a giraffe’s head and neck.
- Long focal lengths tend to work best, as the foreshortening helps with the 2-D effect, and the narrow angle of view allows you to choose the most dramatic section of the sunset sky as your background.
- You can shoot silhouettes at any time of day – a dramatic summer sky with towering cumulo-nimbus storm clouds could work well, for example. But for surefire success, look for dramatic sunrise and sunset skies, with rich red and gold colours, perhaps set off by partial cloud cover. In Africa sunsets are generally best in the winter dry season, when there’s dust in the air.
- Bright, backlit water can also work as a background: you’ll need to be slightly looking down on your subject to frame it against the water.
- Expose for the bright background, so your subject is underexposed and turns nicely black. Bear in mind that light intensity changes rapidly when the sun is close to the horizon, so keep an eye on your exposure. With a long lens, meter off the sky adjacent to the sun – and take care of your eyes by making sure you don’t point your lens directly at the sun.
- Don’t be afraid to dial in some negative exposure compensation, to further enrich the colours. We often shoot at -1 or even -2 EV.
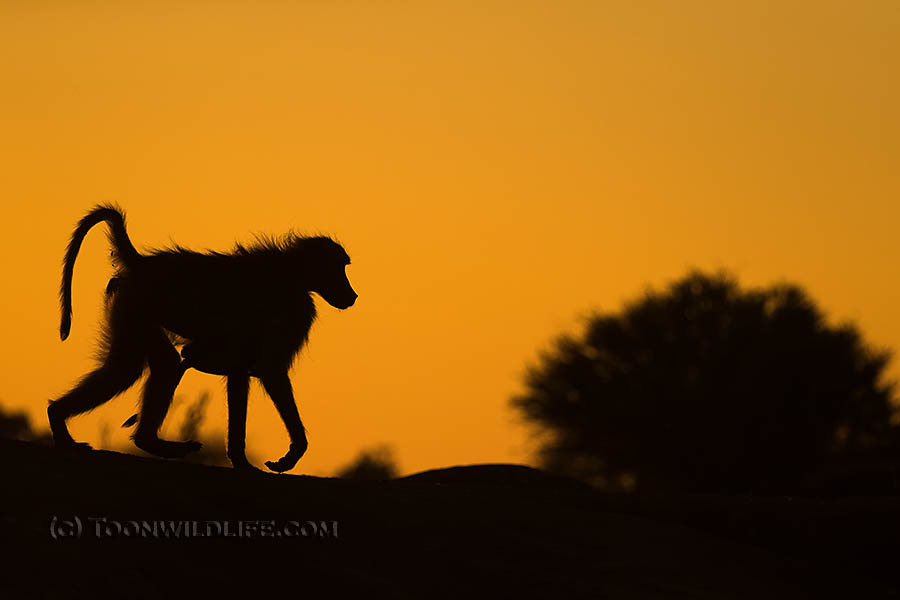
Canon EOS 1Dx II, EF100-400mm + 1.4x Extender, 1/5000 sec, f/7.1, ISO 640
Steve says: Pay attention to the detail, and for moving subjects shoot a burst at high frame rate. In this image that front foot, lifted clear of the ground, gives a sense of movement that elevates the shot above similar frames where the baboon appears static. Most photographers’ reflexes aren’t fast enough to ensure a single shot will get it right, but a quick burst of four or five frames meant one shot did capture the decisive moment on this occasion.
- The final ten minutes before sunset, and the first ten minutes after sunrise, are often the most spectacular. But the half hour before sunrise and after sunset can also produce some gorgeous colours. So don’t pack up the moment the sun sets, just push up your ISO and keep shooting.
- Shooting into the light generally means you will have plenty of speed. To ensure you get a crisp outline, it’s worth dialling some extra depth of field (i.e. shoot at f/8 rather than f/4), and a fairly fast shutter speed, say 1/500 sec or faster. This will give you a little wriggle room if your focus is slightly off, or your subject is moving. Don’t be afraid to raise your ISO to achieve these settings – noise reduction is very easy on these sort of images. We regularly shoot at ISO 1600 or higher for sunset silhouettes.
- If you’re struggling to focus, which can happen when shooting an essentially all-black subject in strong backlighting, try to focus on the edge of the animal. Failing that, switch to manual focus.
- Take plenty of shots, but don’t get carried away and forget composition. Keep it simple, and if in doubt, fall back on reliable aids, such as the rule of thirds.
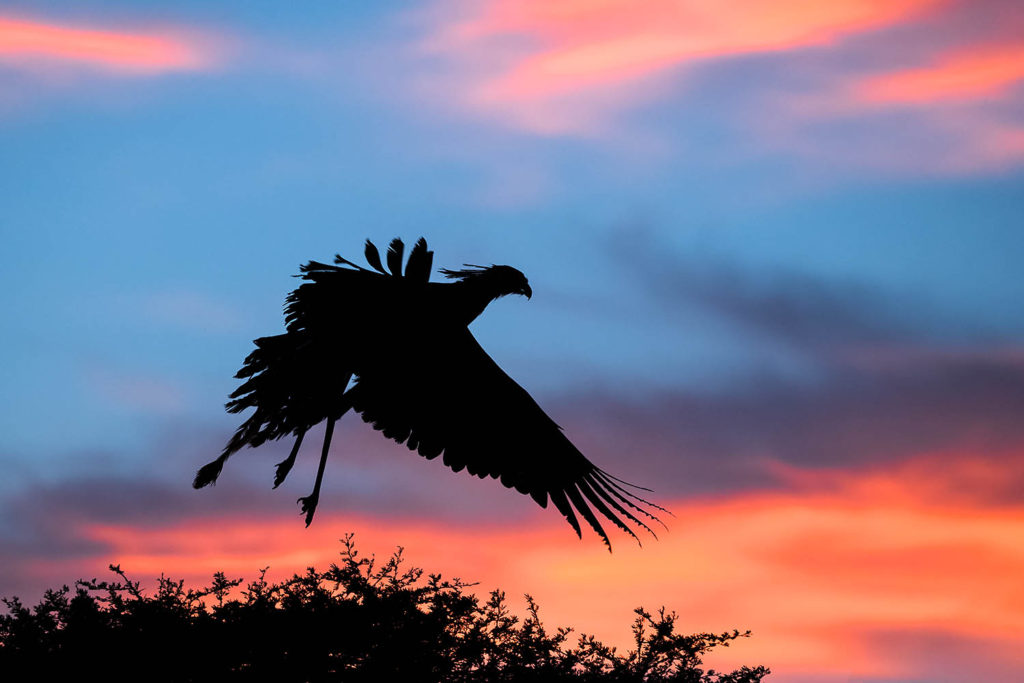
Secretarybird taking flight, Zimanga, South Africa
This was a sunrise sky in search of a subject. Fortunately, we knew where this secretarybird regularly roosted, and had mentally bookmarked it as a sunrise or sunset silhouette opportunity, so we drove to it quickly when we saw the potential of the sky.
Canon EOS 1Dx II, EF100-400mm at 340mm, 1/1250 sec, f/7.1, ISO 2500


Leave a Comment